Materials:
1/3 yard of fabric
interfacing (heavy or craft weight) - only need a 4"x 20.5" piece
1/3 yard of mesh fabric (found in the utility fabric section)
thread
scissors
Instructions:
First you are going to cut out your fabric. You will cut:
Interfacing - 4" x 20.5"
Band fabric - 6" x 21" and a 4" x 26" piece if using same fabric for a strap
Mesh fabric - 12.5" x 20"
2) Iron your interfacing onto the 6" x 21" piece of fabric. Make the interfacing 1" from the top and bottom and 1/4" from each side (as shown in the photo above). Now you will iron down the top inch and the bottom inch on this rectangle.
After ironing that then iron it in half, lining up both edges that you just ironed down.
Now if you are making your own strap then take the 4" x 26" piece of fabric and iron it in half. Open it back up and then iron each edge up to the center crease you just made.
Once you have done that then fold the fabric back in half and press once more. You've now created a strap. For this you could also use cotton webbing to make an even easier strap! That's what I used for the nautical one I made.
Now it's time to get sewing! First top stitch down each side of your strap like so
Next you are going to open up your band piece and line up the edges, right sides together. Sew down one side to make a tube. After you've sewn down one side then fold up the bottom inch on either side like shown below.
Take you mesh piece of fabric and fold in half so that the 12.5" sides make up the sides of your bag (lay it down lengthwise and fold in half that way), you will have a 12.5" tall by 10" wide rectangle. Sew across one 10" side and up the 12.5" side. Leave the 3rd side open, this will be the top of your bag. The mesh is just slightly narrower than the band because it stretches easily.
Now your ready to start piecing this together. The first thing you want to do is fold your band tube in half with the seam being one half. Mark the other side of this so you know where to put your strap.
Take your strap, center it on the seam and the other mark you made and baste in place. Position it so it makes a U hanging down from the band. Line the end of the strap up with the top of the ironed inch. There is a good picture of this below. This is why I took so many pictures because this step sounds confusing but if you see how the strap is positioned it's a piece of cake!
This is how you want to line up your strap!
After the strap is basted in place you are going to make a little sandwich with your band and mesh fabric. Line up the side seams on both pieces and then pin your mesh fabric so it's just below the center crease on the band. The strap should be INSIDE the mesh pouch.
Once it's all pinned in place sew around the entire perimeter just below the center crease. This just hold everything in place making it very easy to do the final seaming. Once sewn you are going to flip the entire thing inside out so that the mesh is right side out and the handle is on the outside like shown below.
Don't lose me now, we're almost done! Fold the band piece back in half and match up the two edges. Pin in place. This time you are going to sew all the way around the BOTTOM. This sews the band together with the mesh in between. Also before you get to the handle pull the handle like it would be when holding the bag, sew it in place in an upward direction.
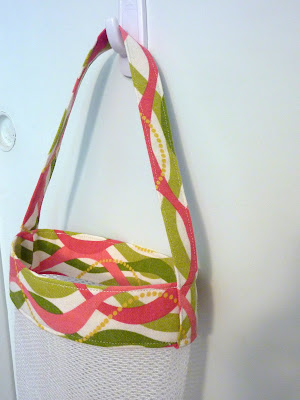
To finish it up and make it look pretty I sewed around the perimeter of the top again, going right over my previous stitches. Again when I got to the handle I held it in place upwards and sewed it. There is a close up of the handle with the stitches below so take a peek if your confused.
Here is the finished bag! So CUTE!! Great for those beach babes or even summer birthdays. I may even have to make one for myself since I love picking up shells just as much as the kids! If you don't have a beach this would also make a great explorer bag for your little nature lover. If you make one I'd LOVE to see it!!
Close up of the handle detail.


No comments:
Post a Comment